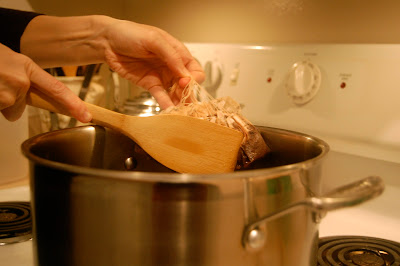
Nourishing News: January 2012

Gain more knowledge, so you can grow your roots, and nourish your bodies!

Welcome to Nourishing News Day! Each month, at the end of the month, I'll be highlighting a few posts from around the blogging world that will be of particular interest and value to you. These posts will cover traditional foods, gardening, holistic medicine, sustainable living, and many other topics similar to posts written on Nourish to Flourish. 

There are so many amazing and wonderful blogs out there, I'm sure that my list could grow quite long, and yet I realize we all don't have the time to peruse the internet for days on end. Instead, take a few moments, as you enjoy your morning tea or eat your lunch, to check out these few encouraging posts.
Here are the blog posts I enjoyed this January:

We already learned the basics for making chicken broth, why not stop by Kendahl's blog, Our Nourishing Roots, and check out her post on making beef broth.
Jen over at Real Food Freaks has written an amazing post on what questions to ask your chicken farmer. This is part of their Egg-cellence Series - you don't want to miss it!
We've been talking about fermenting recently, and Jill at Real Food Forager wrote an unbeatable post about reasons to eat traditional fermented grains: 5 Reasons to Make Sourdough Your Only Bread. If you like to eat bread, but want a healthier, but still delicious way of eating it, check out this post.
Jenny at Nourished Kitchen, one of my favorite blogs, posted a delicious recipe for blueberry almond crumb muffins. The best part? They're grain-free! Mmmm...
I always enjoy stories of people healing themselves holistically and naturally. Over at Food Renegade, check out the post, Reversing MS Through Dietary Changes, to watch the amazing video of Dr. Terry Wahls who cured herself of MS.  
Happy reading!

Making Kombucha: Photo Tutorial


In our last post we discussed the history and benefits of a traditional fermented tea drink: kombucha. Today, we're giving a photo tutorial of how to make kombucha in your own home. This probiotic drink is relatively simple to make. It requires a small bit of preparation on your part, but then you can sit back and let it do its fermentation thang for anywhere between 7-14 days. In the end, you'll have a deliciously scrumptious, very healthy, bubbly drink!
With any fermented and raw product, it is important to begin with clean utensils, containers, and hands. Make sure that everything is in fact clean, and wash your hands prior to beginning the kombucha-making process. 
Kombucha
*The following measurements are for brewing 2 gallons of kombucha. The amounts can easily be halved if you would like to brew 1 gallon (except you don't need to cut the SCOBY in half!).
Ingredients
1 SCOBY (symbiotic culture of bacteria and yeast) - see info at bottom of post
1 cup already prepared kombucha
2 gallons filtered water
16 organic black tea bags, or 4 quart-sized tea bags
2 cups organic evaporated cane sugar (this gets eaten during fermentation)
1 tea towel or other cover with tie/rubberband
Equipment
Ladle
Wooden spoon
Large stockpot
Tea kettle (optional)
Large bowl
Flip-top glass bottles, cleaned commercial kombucha bottles, or other tightly sealing bottles (mason jars will not work)
Funnel(s)
Instructions
1. Boil about 1/2 gallon of the water in a tea kettle. We use a tea kettle because it seems to be faster than boiling it in the pot. If you don’t have a tea kettle, boil the water in the stockpot.
2. When the water reaches boiling point, turn off the heat and pour the water over the tea bags that are sitting in the stockpot. Let the tea steep for 5 minutes. Then strain the tea bags and dispose of them.


3. Add the 2 cups of sugar, and stir, using the wooden spoon, until all the sugar is dissolved.

4. Pour this sugar/tea combo into the 2 gallon glass container. Then add the remaining 1 1/2 gallons of filtered water.
5. Leave the water to cool. You do NOT want to put the SCOBY into hot water as this will kill it. When the water has reached room temperature, then add the SCOBY.


6. Cover the glass container with a tea towel, so that it can breathe. Secure it with a tie or rubberband. Place your brew in an out-of-the-way place that will get plenty of air exchange (you don’t want to place it in a closet). 

7. Allow it to sit for 5-16 days (average 7-9). Periodically, smell or taste a bit of the kombucha. If it is sweet, you need to allow it to ferment longer. The kombucha is ready when it is a bit vinegary. People have their own preferences, but the healthiest kombucha will be the one that is much more vinegary than sugary. We generally ferment ours for two weeks.
Note: Fermentation times will vary with the season. Fermentation speeds up in warmer weather, and slows down in cooler weather. You will need to ferment longer in the winter, and shorter in the summer. Remember, you can always taste a bit of the kombucha to see where it’s at in the process.
8. When the kombucha is done, remove the SCOBY from the brew and place it in a large bowl with 1 cup of the finished kombucha. 

9. Bottle the kombucha by ladling the finished brew into the flip-top bottles. We also use funnels to help transfer the fermented tea.

10. Allow the filled and sealed bottles to remain out on the counter for another 2-3 days. This develops further carbonation, and is an optional step. After the 2-3 days, place kombucha in the refrigerator and enjoy.

Repeat steps 1-5 and begin brewing again!
As I noted in my last post, kombucha is a science experiment. If you follow the above instructions, you’ll pretty much be set; however, the finished product is influenced by temperature and the amount of air it gets. When we first started brewing we were told that our first few batches would be drinkable, but not perfect. However, our first brews turned out delicious! If you’re not satisfied with your first brew, don’t worry, you’ll learn how you like it as you go along. The best thing to remember is that kombucha is very forgiving. It's not an exact science, and doesn't need to be!
So you’re probably thinking: Awesome! Now where can I find myself a SCOBY? The best place to get a SCOBY, in my opinion, is from someone who is already brewing. This way, you can begin brewing immediately. You can also order a dehydrated SCOBY from Cultures for Health, a very reputable company when it comes to fermentation products. Keep in mind if you do this, that you will have to rehydrate the SCOBY, which could take anywhere from 10-28 days.

Lastly, you may have noticed that stores sell flavored kombucha in additional to the original. In order to flavor your fermented tea at home, all you need to do is add 1/4 cup of juice per quart of kombucha during bottling. Allow this to sit out on your counter for the designated 2-3 days, and it's ready for drinking! Have fun with this. Experiment to your heart's content, and then come back and share with us how your kombucha is doing and how you brew your favorite flavors.

Happy brewing!

Kombucha: The Champagne of Ferments


Today we're continuing our series on fermented foods, and lucky for me, we're discussing my absolute favorite ferment: kombucha (pronounced: com-boo-cha)! Really, I am actually a little giddy - there is just no comparison. Kombucha is the champagne of ferments because it's utterly delicious and satisfying. It is the queen of fermentation because it fits in with every meal and any time of day. Oh! It's a win-win all around being delectable, affordable, and easy to brew.

The SCOBY that ferments the tea
Kombucha is a traditional Chinese fermented tea drink.  I know. You’re probably thinking, “In what world does fermented tea taste good?” Trust me. Kombucha will soon (and easily) win over your heart, as it has mine. Are you still drinking soda? Kombucha is your answer. Do you find yourself dehydrated and still not drinking enough water throughout the day? Kombucha is the answer. You don’t want to pay for expensive health store probiotics, but you’re having digestive problems? Kombucha is the answer. Alright, you get my drift. We’ll take a look at why this drink may be the answer to your woes, but first, let’s start at the very beginning.
Kombucha is a dairy-free probiotic drink made from three simple ingredients - tea, sugar, and water. It is slightly sweet with a tangy taste, and is often quite bubbly, which makes it a great replacement for soda. It is fermented using a SCOBY, a symbiotic culture of bacteria and yeast. The SCOBY looks like a cross between a mushroom and a jellyfish. It’s slippery and smooth on one side, and generally has strings of bacteria on its bottom side. Like most fermented drinks that use a culture (like kefir grains), the SCOBY will grow and multiply. The SCOBY, itself, is often referred to as the “mother,” and when it produces a whole new SCOBY, that is referred to as the “baby,” which then eventually becomes a mother, too. Creating kombucha in your own home is a bit like doing a science experiment. Children are completely intrigued; and I have to admit, it’s a very simple, yet quite fascinating process.

History of Kombucha
Legends abound when it comes to finding the origin of this fermented drink. We do know that kombucha has been around for centuries, even a few millennia. One story states that the tea was invented for Emperor Qinshi Huangdi back in 220 BC. The Chinese are famous for their longevity elixirs, and often made use of nature to heal their ills. They referred to kombucha as the “Tea of Immortality.”
Fast forward several hundreds years and we find that it has made its way to Russia, and then, eventually Europe. Its use during World War II was halted due to sugar and tea being rationed; however, after the war, kombucha regained its popularity. In more recent years, kombucha has become common in the United States; there is even rumor it was drunk daily by Ronald Reagan during his presidency. 
Why Should We Drink Kombucha?

Mmm... bubbly!
The standard American diet (SAD) is in terrible shape; you probably don’t need me to tell you that. This blog was created in response to this sad state of affairs - moreso, because many people just don't know what diet is best for them and their family. Fortunately, traditional foods that are nutrient dense, fermented, sprouted, raw, and so on are making their way back onto the dinner table - and for good reason! The motto, “You are what you eat,” is finally being understood by the American people. It is time to make better food choices for ourselves and our family, so that we can truly live healthy and full lives. 
As a reader of this blog, you are likely familiar with the work of Dr. Weston A. Price and that traditional cultures all ate fermented foods. Remember reading the post, Fermented Food for Beginners? In this post we described six reasons why including fermented foods in your diet is beneficial. All those reasons apply to kombucha. But, we can also take a closer look at the particular advantages to consuming this fermented drink. 

Kombucha is purported to have a multitude of benefits and healing properties. As a fermented food we know that it contains a plethora of gut-friendly bacteria. Throughout its fermentation process B vitamins are created in a form that is easily absorbed by our bodies. Kombucha is high in antioxidants, which means it helps to prevent cancer in our bodies by attacking free radicals. It is also high in polyphenols, which help decrease inflammation. Kombucha has also gained reputation for cleansing the liver, improving the skin, hair, and nails, reducing blood pressure, and aiding healthy cell regeneration.
More research could definitely be done on the effects and benefits of kombucha. However, since it cannot be patented or controlled by any pharmaceutical company, there is not much money available to perform clinical trials and wide-scale research. There are a few people who have collected research over the years, including: Gunther Frank, Michael Roussin, and Ed Kasper. Looking into their work would be well worth the time, I’m sure.
Brewing Your Own Kombucha
My husband and I started brewing kombucha this past fall, and we love it! In my experience, I feel much better when I drink it, as it helps my gut to digest the food I eat. It is also a great method for hydration. You can find raw kombucha in the stores, but a 16 oz bottle costs around $4.00! Brewing kombucha at home is, comparatively, quite frugal.
One last point to address is the alcohol conundrum. There is some question about how much alcohol is contained within kombucha being that it is a fermented drink. Companies that sell kombucha in stores are actually required to test the alcohol content. The kombucha does contain alcohol, but it's in such small amounts that it isn't even required to be sold as an alcoholic beverage. The estimates of alcohol content are around 0.5%. Many pregnant women, who were already used to consuming kombucha, continue drinking during pregnancy for the vitamins and probiotics this wonderful drink provides. Of course, as the drinker, it is up to you to decide what is best for you and your family.
Join me in my next post as I give you a photo tutorial on how to brew kombucha in your own home.


This was entered into Nourishing Gourmet's Pennywise Platter.

Fresh: The New Food Documentary - Watch it for FREE


A new food documentary has just been released: Fresh. This film is upbeat, positive, and promotes the local, sustainable growing of food. It features Joel Salatin from Polyface Farms and Will Allen from Growing Power, Inc, among others. While it does expose the food industry for what it is (unsustainable and harmful), the movie focuses on what we can do in our own neighborhoods to support agriculture that is sustainable and beneficial to everyone. 


The best part? For the next couple of days it is FREE to stream from your computer and watch. How cool! I just finished watching it this afternoon, and it was great. Just follow this link to sign up to watch it for free. Go check it out!


Here's how the producers describe their documentary:

FRESH celebrates the farmers, thinkers and business people across America who are re-inventing our food system. Each has witnessed the rapid transformation of our agriculture into an industrial model, and confronted the consequences: food contamination, environmental pollution, depletion of natural resources, and morbid obesity. Forging healthier, sustainable alternatives, they offer a practical vision for a future of our food and our planet.

Lacto-Fermented Salsa: Recipe


The Super Bowl is only a week away, and many of us are scrambling to get recipes together for the big game. I mean, really, the Super Bowl is more about eating than anything else, right? It's often a time when we fill our bellies with tons of sugar, rancid grains, and polyunsaturated oils in the form of junk food - commonly known in this household as frankenfood because it's certainly not real, natural, or meant to be eaten. But, we do have other healthier options, and they don't involve eating celery sticks and carrot juice. Blech! No, thank you. Healthy eating doesn't mean boring eating. Healthy eating means pastured meats, fats like lard, coconut oil, butter, raw nuts and cheeses, fruits, vegetables, wild seafood, whole fat, raw dairy, traditional sourdough, and let's not forget lacto-fermented foods. Healthy eating means flavor, and lots of it! We were given taste buds for a reason, and it wasn't so they could be hoodwinked by artificial flavors. But, back to fermented foods. You've already learned about the benefits of consuming homemade ferments, and yesterday I posted the recipe for making whey. Whey is a vital nutrient in most lacto-fermented foods. Making and eating your own fermented foods gives your family a budget-friendly way to get vitamins, minerals, and probiotics into your bodies. Plus, ferments are just plain delicious, and you don't want to be left out of the fun!

Yes, it's time for you to get a bit adventurous. But, have no fear, the process is actually very easy, and the result? Spicy perfection. I bring you a delicious recipe for something many of us eat: salsa! This is the perfect food to introduce to your friends during the Super Bowl. What party doesn't generally have a bowl of chips with a side of salsa? Or, how about introducing it to your family on Taco Night? So, gather your ingredients and make that whey; you’ll soon be wishing I posted a recipe for homemade tortilla chips!

Salsa
from Nourishing Traditions, by Sally Fallon
Makes 2 quarts
Ingredients:
4 medium organic tomatoes, peeled and diced (I usually double this)
2 small onions, finely chopped
3/4 cup chopped chile pepper, hot or mild
6-8 cloves garlic, peeled and finely chopped (optional)
1 bunch cilantro, chopped
1 teaspoon dried oregano
2 lemons, juiced
1 tablespoon sea salt
4 tablespoons whey (if not available, use an additional 1 tablespoon sea salt)
1/4 cup filtered water
Instructions:
1. To peel tomatoes, bring a pan of filtered water to boil. Using a slotted spoon, dip tomatoes in, one or two at a time, for about 10 seconds each. The skin should remove easily.
2. Mix all ingredients together and place in a quart-sized Ball jar. Press down lightly with a meat hammer or wooden pounder, adding more water if necessary to cover the vegetables. The top of the vegetables should be at least 1 inch below the top of the jar.
3. Cover tightly and keep at room temperature for about 2 days before transferring to cold storage.

*If you desire a non-chunky salsa you can toss the ferment into your blender for a few spins. Waalaa! Smooth salsa!


This was entered into Food Renegade's Fight Back Friday,  Nourishing Gourmet's Pennywise Platter, and Real Food Forager's Fat Tuesday.

The Way to Whey: Recipe


In the last post we were introduced to the benefits of making and eating naturally fermented foods. The items needed to make ferments are nothing fancy - just your everyday foods: fruits and/or vegetables, sea salt, and whey. But, wait! Do you have whey in your refrigerator? Do you even know what it looks like? For the average American, whey is an uncommon ingredient, but in the past it was everyday fare. Before I began using whey regularly, there was only one other reference I had ever heard regarding it. Does this old nursery rhyme come to mind?
Little Miss Muffet
Sat on a tuffet,
Eating her curds and whey;
Along came a spider,
Who sat down beside her
And frightened Miss Muffet away!
Little Miss Muffet may have been onto something; whey has many health benefits. Although whey is used in many traditional foods and is considered a must-have in any traditional kitchen, the focus in this post is using it for lacto-fermentation. In the future I’ll give you many more recipes which use whey as an ingredient. 
What is Whey?
Whey is the yellowish liquid that is leftover after milk is curdled. It has a long shelf life and can last up to 6 months in the refrigerator. It is not the same as the powdered, unhealthy, and denatured whey, which is often sold in health food stores. They are NOT interchangeable.
Whey is full of proteins, vitamins, minerals, and enzymes. In the article, Enjoying Miss Muffet’s Curds and Whey, Jen Allbritton writes, 
“Whey is the tart, golden liquid known to the Greek doctors of antiquity as ‘healing water.’ In fact, Hippocrates and Galen, two founding fathers of medicine, frequently recommended whey to their patients. Whey from fully fermented milk no longer contains lactose, and with its dose of probiotic organisms will help maintain a synergistic balance of the inner ecosystem and encourage repair of gut dysbiosis. Whey also contains a fair number of minerals, particularly potassium, and a notable amount of vitamins, especially B2.”
Homemade cultured whey is very important for making fermented fruits and vegetables. It is true that you can make vegetable ferments without the use of whey (by adding additional sea salt), but it is better to use this nutrient-packed ingredient. Fruit ferments always need whey. Whey is made from farm fresh raw milk. However, if you don’t have access to fresh milk, whey can also be made from plain, whole fat, organic yogurt. 
I’m going to assume that not everyone has access to fresh, raw milk, so today I will share an easy recipe for making whey. This recipe will also give you about 2 cups of cultured cream cheese - it is so scrumptious!
Whey and Cream Cheese
based off the recipe found in Nourishing Traditions, by Sally Fallon
Makes about 3 cups whey and 1 cup cream cheese
Ingredients:
2 quarts plain, whole fat, organic yogurt
Instructions:
1. Line a large strainer set over a bowl with a clean dish towel.
2. Pour in the yogurt, cover, and let stand at room temperature for 12-24 hours. The whey will run into the bowl and the milk solids will stay in the strainer.
3. After several hours, tie up the towel with the milk solids inside, being careful not to squeeze. Hang the towel with the milk solids from a cabinet knob, or tie this little sack to a wooden spoon placed across the top of the container so that more whey can drip out.
4. When the bag stops dripping, the cheese is ready. Store whey in a Ball jar and the cream cheese in a covered glass container. The cream cheese keeps for about a month if refrigerated and the whey will last about 6 months.

That's it! Having whey on hand will enable you to make scrumptious ferments. Up next, is a recipe for lacto-fermented salsa! Stay tuned...

This was entered into Food Renegade's Fight Back Friday,  Nourishing Gourmet's Pennywise Platter, and Real Food Forager's Fat Tuesday.

Fermented Food for Beginners

Freshly made kimchi
One of the bigger steps we took to transitioning over to a whole, unrefined traditional foods diet was eating lactic acid fermented vegetables, fruits, and milk. I had incorporated grass-fed meats and healthier eggs, had started purchasing produce from our local farmers, and had decreased our consumption of sugar, but I just didn't have the courage to begin making and eating fermented foods. Fermenting foods reminded me of the can of sauerkraut my mom would serve for dinner yearly on St. Patrick's day. It would stink up the whole house and had an even worse mushy consistency. Why would I willingly make something like that? Little did I know how different store-bought fermented foods are than homemade lacto-fermented foods. Thankfully, through a group of friends, our palettes were finally exposed to the wonderful world of fermentation. Since then I have been fermenting and experimenting to my heart's content - or should I say stomach's content? :)
Fermenting foods dates back thousands and thousands of years. There are even cave drawings dating back 12,000 years of men obtaining honey from hives and using it to make mead, a honey wine. More recently, during the 19th century, the English explorer, Captain James Cook, had sixty barrels of sauerkraut hauled aboard his ship for his second trip around the world. The kraut lasted for 27 months and fed the crew well. Captain Cook was later recognized by the Royal Society for conquering scurvy, the disease that results from vitamin C deficiency, which had plagued many other sea crews (source). This is because lacto-fermented sauerkraut contains ample amounts of vitamin C. While the Captain got the glory, cultures all over the world had been eating these fermented foods for centuries; it was just part of their daily life, and still is, in many areas, today. The Koreans eat kimchi, cortido is popular in South America, miso, tempeh, and tamari are traditional Asian foods, kefir is a staple in Russia, and the list could go on. Our ancestors were experts at preserving food and drink, and this was done primarily through lactic-acid fermentation. 
You can ferment almost anything: milk, grains, meats, vegetables, fruit, etc; but today, we are primarily focused on fermenting fruits, vegetables, and dairy products. In my opinion, these are the easiest foods to ferment, and so they are great for beginners. Let’s take a look at the process, and then discuss why we would want to eat fermented foods. 
What is Lactic-Acid Fermentation?
Lactic-acid fermentation is a process by which the starches and sugars in dairy products, vegetables, or fruit convert to lactic acid by friendly lactic-acid producing bacteria (source). Making ferments at home is actually quite simple. First, the fruits and vegetables are washed and then cut, chopped, or shredded. Next, they are combined with herbs or spices, sea salt, and whey, and pounded with a meat hammer to release the juices.  Then, the ingredients are pressed into an air tight container, like a mason jar. The tightly sealed containers are then placed in a cabinet for two to three days in order to allow the good bacteria to proliferate. The salt keeps the bacteria from putrefying until enough lactic acid is created, which preserves the food for months. Using whey reduces the time needed for enough lactic acid to be produced. Afterwards the ferments can be stored in the fridge. It is widely known that veggie ferments increase in flavor over time, and can last for many months, but fruit ferments should be eaten within two months.
Sauerkraut ingredients waiting to be pounded
Today, we have things like canning machines and refrigerators, which don't make fermentation necessary, so why would we take the time to do it? Well, for starters fermenting foods has many more benefits than just extending its shelf life. In fact, many scientists today are just beginning to understand what was apparent to the cultures of old: lacto-fermented foods are a gold mine for health. Consider these reasons to start incorporating lacto-fermented foods into your family’s diet.
Six Reasons to Eat Lacto-Fermented Foods
1. The process of fermentation breaks down already present nutrients into more easily digestible forms. You’ll likely absorb more of the nutrients in food when it is fermented. For example, fermenting dairy products, like milk, breaks down lactose into lactic acid. Lactose is a sugar which often causes digestive difficulties in many people. (source)
2. Fermentation can CREATE new nutrients, especially B vitamins, including folic acid, riboflavin, niacin, thiamin, and biotin. (source)
3. Ferments work as antioxidants, and take care of the "free radicals" that can be cancer precursors in your body by helping to flush them out of your system.
4. Fermentation can remove toxins from foods. For example, grains contain a compound called phytic acid, which blocks absorption of minerals, like zinc, magnesium, calcium, and iron. Soaking grains before cooking them neutralizes this phytic acid, so when you consume the bread the fermented grains will allow you to absorb many more minerals.
5. Eating fermented foods provides a wide array of probiotics for your intestines. Remember, lacto-fermenting foods means that the food is raw, alive, and full of gut-friendly bacteria. Are you having digestive problems? Eating homemade ferments are a great support to your gut. They are much cheaper than your health store’s fancy probiotic supplements. (source)
6. Homemade ferments are a great way to maximize your family’s overall nutrition while keeping within a budget. How great it is to grow or buy produce which is already healthy for you and then be able to multiply its nutritive properties through lacto-fermentation!
Kombucha: a bubbly fermented tea drink
On a final note, it is important to point out that the fermented foods you find in your grocery store are vastly different than the lacto-fermented foods you can make in your home. These store-bought foods, like sauerkraut, yogurt, and pickles are generally pasteurized, which means they are heated to a point at which the enzymes and beneficial microorganisms die. Although yogurt is touted to contain beneficial live cultures, the yogurt is generally pasteurized after culturing, which kills all the natural bacteria; then, a few specific types are artificially added in at the end. This is an incredibly inferior product compared to the yogurt you could make at home. If you want the benefits from lacto-fermented foods, you’ll need to make them yourself, or take the time to scout them out in your area.
Are you ready to take the plunge and make some fermented foods? Join me in a few upcoming posts as I give recipes for making fermented salsa, kimchi (korean sauerkraut), milk kefir, and kombucha. 


This was entered into Kelly the Kitchen Kop's Real Food Wednesday,  Food Renegade's Fight Back FridayNourishing Gourmet's Pennywise Platter, and Real Food Forager's Fat Tuesday.

Homemade Taco Seasoning: Recipe


As we’ve been transitioning over to a more natural and traditional diet, we’ve learned to start doing things ourselves. It’s empowering; it’s liberating; and it’s just darn tasty! One of those things we learned to do quickly was to make our own sauces and spice mixes (Thanks, Mom, for this recipe!). Taco seasoning is by far one of the easiest mixes to make. This is a fantastic reminder that feeding your family good, healthy, whole foods does not have to mean slaving away in the kitchen all day. Making taco seasoning at home is also a great way to avoid the MSG and sugar-laden spice packets you find at your grocery store. Finally, it is just more economical. 
Since we're a mostly grain-free family, we don't eat tortillas. Most of the time we eat our tacos as salads, or use romaine lettuce leaves as our shell and call them taco boats. Other times we use the seasoning for shredded beef burrito bowls. It's fun and delicious, and we really don't miss having the tortillas. Although, sometimes I will fry 100% corn tortillas (non-GMO) in lard just for the husband - these are lip-smacking good! Tacos are a favorite meal around here; the seasoning is just that good, so I make this about once per week. 
Taco Seasoning
Per 1 pound of meat:
2 teaspoons organic chili powder
1 teaspoon sea salt (I use RealSalt)
1 teaspoon organic garlic powder
1 teaspoon organic cumin
1/2 - 1 teaspoon organic cayenne (add more or less depending on desired spiciness)
A small amount of filtered water
1. Place meat in a pan on medium heat, and cook thoroughly. I usually toss in some chopped onion as well.
2. Turn heat to low and add seasonings into the meat. Add the water to facilitate the blending of spices if you find your meat to be dry. 
3. Your meat is now deliciously spiced and ready for whatever dish you are serving tonight!
You can also multiply the recipe, mix all the ingredients together, and then store in an air-tight container. This way you already have the taco seasoning made and only need to scoop out 2 tablespoons of seasoning per pound of meat. What a great time-saver and a tasty one at that!
What other spice mixes would you want to learn to make yourself?

This was entered into The Healthy Home Economist's Monday Mania,  Real Food Forager's Fat TuesdayKelly the Kitchen Kop's Real Food WednesdayFood Renegade's Fight Back Friday, and Nourishing Gourmet's Pennywise Platter.
Photo Credit: 1237723 by nkzs

Hearty Chicken Soup: Recipe


If you've ever looked for a chicken soup recipe, you've noticed there are a LOT of them out there. The best part about this is that there are some great ideas for variations on this classic recipe - thai chicken soup, anyone? The worst part is that there are so many recipes with unhealthy ingredients; soups loaded with vegetable oils, margarine, and refined grains. We've truly lost sight of the original benefits of chicken soup, like the minerals and fat found in homemade broth. Yes, saturated FAT is GOOD for you! Anyway, before I lose myself on another fat is phat rant, I wanted to eliminate this need to go searching for the perfect chicken soup recipe. Today I present to you THE best chicken soup recipe you'll ever come across. Now, this doesn't sound very humble, I know, but I wasn't the one who came up with the base of the recipe, so I feel like I can say that. In fact, I don't even remember who came up with this recipe. It has been tweaked and changed so many times that I'm going to share with you how I make it, and then you can continue to tweak it to your family's personal tastes. 
In my last couple of posts we learned about the benefits of homemade bone broths, and I gave you a recipe for chicken broth to start you off on your traditional foods journey. Today, you'll be using that chicken broth to make the most perfect, delicious pot of chicken soup your family has ever laid their lips on. So, without further ado...
Hearty Chicken Soup
2 tablespoons organic pastured butter (feel free to use more)
1 cup chopped organic carrots
1/2 cup diced organic onion
1/2 cup diced organic celery
1-2 cups chopped organic zucchini (optional)
6 cups homemade chicken broth
2 cups or more diced organic pastured chicken
1 - 1 1/2 teaspoons sea salt (I use RealSalt)
1 t organic dried marjoram
1 t organic dried thyme
1/4 teaspoon organic pepper
1. In a medium-sized pot on low heat, sauté carrots, onion, and celery in butter for 5 - 10 minutes, or until tender.
2. Add zucchini (if using), homemade chicken broth, diced chicken, and spices. Mix and cover. Turn heat up a bit, and bring to a very low simmer. Turn off heat and allow soup to sit for about 20 minutes. 
3. Ladle into bowls and serve with homemade lacto-fermented sauerkraut, pickles, and some raw cheddar cheese.
Serves 4
As you can see, this is a very simple recipe. It doesn't need to be difficult to be delicious. The secret is in the homemade broth and the marjoram. Whenever I have served this meal, someone has always commented on how they have never tasted any soup so delicious. I truly think people have become used to the bland-tasting broths that are sold in stores and used in most restaurants. This is a tragedy... but it's not too late to remedy this problem. I guarantee you'll get smiling faces when you serve this soup.
I'd like to make one note: We are a grain-free household. That's right, not just gluten-free, we are completely grain-free. I've been following the GAPS diet for about a year in order to heal my gut, and part of the diet is eliminating stress on the intestines, which means not eating complex carbohydrates. We add zucchini to our soup as a replacement to noodles. It helps to make the soup heartier. I enjoy the zucchini, and it's much healthier than the noodles would be. Feel free to use the zucchini or throw in a different vegetable that your family enjoys. 
During this cold, winter season, it's a perfect time to make this chicken soup, and it will help to provide your family with the nutrients to stave off colds and flus. Are you ready? It's time to take your taste buds for a joy ride!
What is your favorite variation on the traditional chicken soup recipe?

Golden, Rich, & Delicious Chicken Broth: Recipe


Yesterday we talked about the benefits of bone broth. Today, I'm sharing my recipe for chicken broth. I make this chicken broth at least once a week. It's golden, rich, and delicious - you won't be disappointed. We'll also be considering different methods of cooking broth and various storage possibilities.

If you were to ask around, you’d find that most people make chicken broth more often than any other sort of broth. It’s the easiest to make, and in the average American household, we probably tend to eat chicken more than beef or fish. That being said, both beef and fish broths are just as beneficial and even offer some nutrients that chicken broth does not. So, while today’s recipe is for chicken broth, feel free to experiment with other types in the future. 
There are a few ways to make bone broths, but let’s first start with the basic recipe, and then discuss your options.


Basic Homemade Chicken Broth
Giblets from chicken (heart, neck, liver, etc.)
2-4 chicken feet (optional: I keep these in the freezer - great for added gelatin!)
2 tablespoons organic, raw apple cider vinegar (I use Bragg’s)
2 organic onions, chopped
4 organic celery stalks, chopped
3 organic carrots, chopped
Filtered water
1. Place the bones, giblets, and chicken feet into a large stockpot. Pour the apple cider vinegar over the bones and let sit for 30 minutes to an hour. This helps to pull out the minerals, like calcium, from the bones.
2. Add the chopped veggies and cover with filtered water about an inch above the top of the ingredients. Bring to just before a boil, turn heat down to very low, and remove the scum that has risen to the top. 
3. Keep broth at a very low simmer for at least 3 hours, ideally 24 hours. The longer you simmer the more flavor and nutrients will be added to the broth.
4. When finished simmering, strain broth through a colander.
Various Broth-Making Methods
If you scrounge around the internet you’ll find a myriad of creative ways to make broth. Below you’ll find a few of my favorites.
Slowcooker Broth: Make your broth in your crockpot or slowcooker (following the recipe above). If you’re not used to leaving your house with your stove on, this might be a good solution for you. Be careful though, sometimes crockpots can’t heat the broth low enough and even on the warm setting the broth ends up boiling - something you want to avoid.
Perpetual Chicken Broth: Continuing with the idea of the slowcooker method, some like to continually cook broth on their countertop, adding more bones throughout the week and ladling out whatever they need at each meal. This allows your broth to be available and ready to go whenever you need it. You can read more about this method over at Nourished Kitchen.
Whole Chicken Broth: You can also begin your broth by using a whole, uncooked chicken. If you do this, follow the recipe as written above, but remove the chicken from the stockpot after 2 hours, carefully remove the meat from the bones, and place the bones back in to simmer for the remaining time. Store the meat in the fridge to use later in salads or soups. If you leave the meat in the broth for the full 24 hours, it tends to become quite tough. 
Broth Storage Options
Chicken broth will last in your fridge for about a week, but if you can’t use a gallon of broth in a week, what do you do? Some people freeze their broth in small (2-3 cup) containers, so that they only have to defrost what they will use in one meal. You can also freeze the broth in ice cube trays, and then store the frozen cubes in a freezer bag. This works well when you only want to use a small amount of broth for cooking veggies, grains, or for use in sauces. You can use a combination of the above choices to work out the best solution for your family. 

Now that you have a recipe, start saving those leftover chicken bones, and get ready to have this incredibly healthy, mineral-packed, delicious broth on hand. Are you still looking for an excuse to make it? Join me in my next post as I share my recipe for the absolute best chicken soup you've ever eaten, a perfect hearty dinner for these cold winter days.

Are you going to try making chicken broth for your family? 
If you did, how did it turn out?